Cilantro-Lime Hummus

IMG_5135
I hear from a lot of people that October is the best month of the year. I can agree with that because most of my favorite things happen this month. My hometown has it’s Avocado Festival, pumpkin patches move in, all the best movies play on TV, the world series happens (still upset over the major Dodger loss!) and of course, Halloween.

For as long as I can remember, Halloween has always been a big deal to me. I love the creepy, colorful, and creative things that go along with it. The seasonal stores pop up in old electronic stores and I just can’t help but walk through them several times throughout the month.  I always have the hardest time deciding on a costume because my anxiety of “it only happens once a year!!” takes over and I can’t make up my mind. I still have a few different ideas I’m considering even though the 31st is right around the corner.  I’ll get there.

IMG_5104

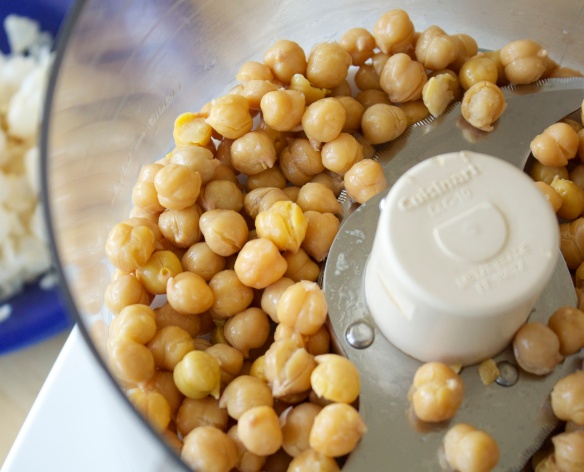
Halloween chat aside…This is really amazing hummus. I make fresh hummus about 1 to 2 times per month, which always ends in a conversation with myself about how I should make it more often. Especially since Deb Perlman  wrote about the secret to the smoothest hummus you’ll ever have. She recommends removing the skin from the chickpeas . Yes, I did just admit to peeling chickpeas. Sounds crazy, but it only took me 7 minutes to peel them all and it is so worth it. I’ve been converted to chickpea peeler and I’m never looking back.

Ingredients:

1 3/4 cups cooked, drained chickpeas (15 ounce can)

1/2 cup tahini paste

2 tablespoons freshly squeezed lime juice (or more to taste)

1 small clove garlic

3/4 teaspoon table salt (or more to taste)

1/4 cup-1/2 cup loosely packed cilantro leaves

Roughly 1/4 cup water


Instructions:

Peel your chickpeas. It’s easiest when you hold the chickpea between your thumb and finger and begin to lightly press down. Discard the skins.

In a food processor, blend the chickpeas for a full minute, scraping down the sides of the bowl as needed. Add the tahini, lime juice, garlic, salt, and cilantro. Blend until the mixture is well pureed. Scrape down the sides of the bowl. With the machine running, slowly add in the water until smooth. At this point, you can determine the thickness of your hummus by how much water you add. Taste and adjust seasonings as needed.

Note: The garlic tends to intensify the longer the hummus sits. If you find with an initial tasting that you want more garlic, use caution. It’s very easy to get too much.


Source: Techniques and recipe adapted from The Smitten Kitchen

Strawberry Birthday Cake

IMG_6312

Oh how the time is flying. I really must be getting old. A few weeks ago, I celebrated another birthday. It was so nice to be home with the family and catch up with others that I hadn’t seen since before the last move. We even set up the piñata that my mom left on my front porch a year ago…which was a big red Angry Bird.  Definitely worth the year we waited. While I loved seeing my cousin’s little one swing at it, I got such a laugh watching my older brothers try and crack it open while my dad pulled the rope to keep it away from them. It felt like we were all kids again, running around Torro Canyon park with our baseball bats and dirt on our faces.

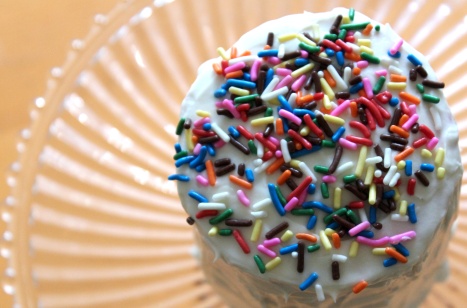
Even though J made me an awesome celebratory birthday dinner, (Martha/Deb’s Mac & Cheese, I taught him well!) I do love to make my own birthday cake. I will take any excuse to bake. Since it was just the two of us, I wanted something small, but with layers. I was also looking for an excuse to use my lovely cake pedestal. Priorities.  Thats when I remembered seeing this awesome Neapolitan Layer Cake.  I didn’t think we needed all the flavors this time around, though after trying the strawberry, I would love to make this recipe in full. For now, the strawberry cake was enough. I paired it with a basic cream cheese frosting, and it was just what this birthday girl called for.

IMG_6301

I should also tell you that we introduced a new member to our little family. Remi is our new pup and she’s fitting in quite nicely. She also very much approves of this cake recipe.

IMG_6326

Ingredients:

1¼ cups plus 2 tbsp. all-purpose flour

1¼ tsp. baking powder

¼ tsp. salt

1 cup sugar

1½ oz. strawberry gelatin

8 tbsp. unsalted butter, at room temp

2  eggs

½ cup milk

1½ tsp. vanilla extract

¼ cup sweetened strawberry puree*

*Process almost-thawed frozen strawberries in a blender until smooth.


Instructions:

Preheat the oven to 350 degrees fahrenheit.

Butter and flour the edges of desired cake pans. (I used three very small round pans and used the rest of the batter in mini cupcake pans.) In a small bowl, combine the flour, baking powder, and the salt. Set aside. In the bowl of a stand mixer, combine the sugar, gelatin, and butter. Beat on medium-high until the batter becomes light and fluffy, which was about 3 minutes. Beat the eggs into the batter, one at a time, scraping down the sides of the bowl as needed. Slowly mix in half of the dry ingredients until just incorporated. Blend in the milk and vanilla. Add the rest of the dry ingredients, again mixing until just barely incorporated. Blend in the strawberry puree.

Pour into prepared pans. My mini cakes only baked for about 12 minutes. Baking times for larger cakes will need to be adjusted.

Pulled from Annie’s Neapolitan Layer Cake

White Chocolate “Brownies”

IMG_5640

Twelve more days until I can begin introducing “trigger” foods back into my diet.  I’m counting minutes.  While cutting out these foods for the last three months was easier than I thought it might be, it certainly had its challenges. (And breakdowns. And fits.) I seriously had the brownie cravings. Oddly enough though, I wouldn’t normally consider myself a brownie hound. Or even chocolate for that matter. Don’t get me wrong, I really like chocolate. But given the choice, I usually pick vanilla. I heard on television this morning that vanilla choosers tend to be more reckless and adventurous…Right. That’s why we’re choosing vanilla all the time.

IMG_5609

IMG_5618

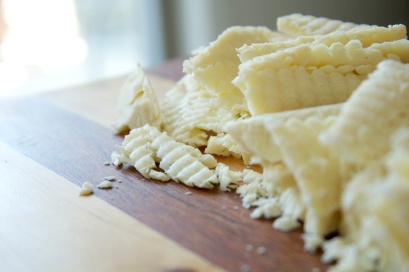
What I realized is that it wasn’t the chocolatey-ness of the brownies that I missed, but it was their chewy-dense-fudgy texture. Especially the edges.  I pick brownie edges first every time. So after watching everyone eat brownies for the last few months, I finally decided I couldn’t wait 12 more days. This recipe happened instead and I’m SO glad it did.  As we’re headed to visit my family this weekend, I’ll be happy to take the rest of this batch with me to share.  Otherwise, I could easily eat all of them.

IMG_5654

Ingredients:

6 oz white chocolate, coarsely chopped

5 tablespoons butter

2 eggs

1 cup sugar

2 teaspoons vanilla

1 cup AP flour

½ teaspoon baking powder

½ teaspoon salt

Instructions:

Preheat your oven to 350 degrees F. Grease a 9×9 inch pan and set aside.

In a small saucepan over low heat, melt the white chocolate and butter. Keep a watchful eye as it can burn quickly. When the mixture is almost all melted, remove from heat and keep stirring. Mine almost looked a bit curdled at this point. Not to worry, it will all come together.

In a separate bowl, whisk the sugar, eggs, and vanilla until nice and smooth. Add the white chocolate mixture and stir until well combined. Add flour, baking soda, and salt. Stir until just combined. Note: If you prefer to add nuts, extra chips, dried fruit, etc, this is a good time to do so.

Spread evenly into your prepared pan. Bake for 25 minutes. The top will be a nice, golden yellow. Cool. Cut. Enjoy.

Source: Slightly adapted from Lovin’ From The Oven

Yeast-less Flat Bread

IMG_5573

So much has changed for us in the last month, I don’t even know where to begin. I guess I’ll start with the major changes. We moved! Yes, no longer in my adorable, teeny-tiny, semi-awkward kitchen. Instead I’m in a huge, finished kitchen, complete with dishwasher (whaaat?!).  I actually complained the other day that the dishwasher won’t empty itself. Yes, I said that. Then I remembered this magic machine actually washes dishes for me. The least I could do is put them away and hope it didn’t hear me complain…

IMG_5579 IMG_5534

Major change number two is my health. I’m not taking migraine medication anymore… For the first time in about 7 years. It’s been almost 3 months, and things are going pretty well. This all came about after my doctor recommended a low/zero Tyramine diet. What? That meant I had to completely take out things like cheese, chocolate, cultured dairy, anything aged/cured, yeasted breads, nuts, onions, and my favorite of them all, avocados. No! The theory behind this diet is that I’m allergic to one/some of these items, which is what could be one cause for the migraines. I’m still not sure that is the case, as I’m still going through the allergy “cleanse”, but seeing the major changes in the way I’ve been feeling is turning me into a believer. I’m hopeful.

So because of this diet change, the way I’ve been cooking and eating has had to change drastically. It’s so difficult to go out and eat at a restaurant now, mostly because onions turn up in just about everything. Because of that, I’ve stepped up my cooking game a lot more. With so many restrictions, it has become my personal challenge to create meals I can still have, without compromising on taste.

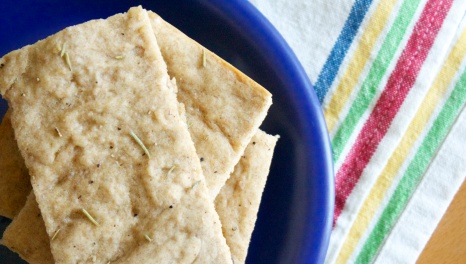
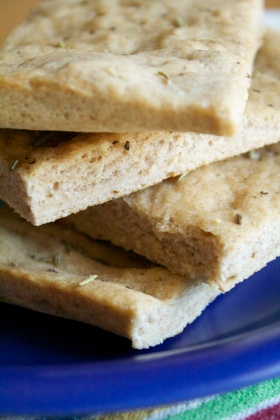
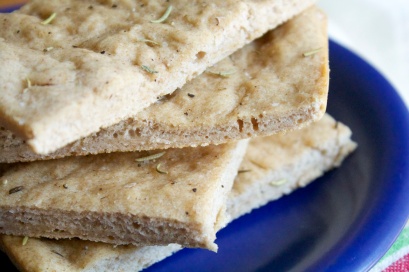
Aside from the yogurts, avocados, and chocolate, fresh bread has been very missed.  I had gotten used to making a loaf of fresh bread almost every week, only to be told I could no longer have it. While I find myself not eating breads/crackers very often anymore, this flatbread recipe helps me get through when I think I need it. Plus, it is super simple to make and can take on any flavor profile you like. My favorite way to eat it is with some tomato and lemon pepper on top.

IMG_5556

Ingredients:

1 cup water

1 cup whole wheat flour

1 cup AP flour

2 teaspoons baking powder

1 teaspoon salt

1 tablespoon extra-virgin olive oil, plus more for pan

1/2 teaspoon fresh ground pepper

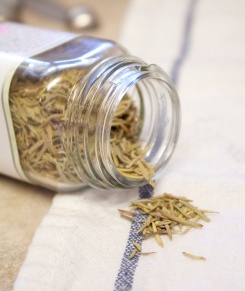
1 teaspoon dried rosemary

Sprinkle of sea salt

Instructions:

Preheat oven to 425 degrees F. Oil a 13×9 inch pan with olive oil.

In the bowl of an electric mixer, whisk both flours, baking soda, and the salt. Add the water over the mixture. Using the dough hook, mix on medium speed until the dough all comes together. It will still be very sticky, but should all be combined well.

Scrape dough out of the bowl and into the prepared pan. Using a little bit of olive oil on your fingers, evenly spread out the dough around the pan, taking it all the way to the edges. Drizzle dough with remaining olive oil. Sprinkle pepper, rosemary, and salt over the top.

Bake for 20 minutes, or until the top just begins to golden. Cut into desired portions.


Adapted from All Recipes

Smitten Maple Granola

IMG_3461

I’ve been loving the Smitten Kitchen cookbook ever since I got it. Which makes perfect sense because I read the blog regularly. What I love about her style of cooking is it seems to practical and her likes seem to align with mine. Perfect. Done, lets get cooking.

IMG_3466

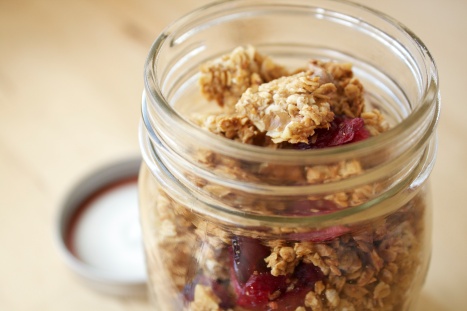
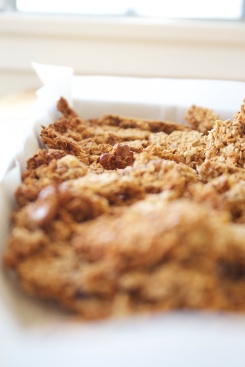
I’m big on breakfast. Especially yogurt, and yogurt with granola. I go through it really quickly and now that I can make my own I don’t feel so bad about it. Even better, this recipe makes the big yummy clusters that I love so much. Lets be honest, I always reach for the clusters first. I made a few modifications because I didn’t have everything in my pantry, but it still came out great.

IMG_3415

Ingredients

3 Cups old fashioned rolled oats (not instant)IMG_3437

1 cup walnuts, coarsely chopped

2 Tablespoon olive oil

1/2 teaspoon salt

1/2 cup maple syrup

1/4 teaspoon ground cinnamon

1 large egg white

1 1/2 cups dried cranberries

Instructions

Preheat oven to 300 degrees

Combine ingredients (except the egg and cranberries) in a large bowl. Whisk the egg white in a small bowl until frothy and then pour over the granola mixture. Mix well. Spread the granola in a single layer onto a baking sheet lined with parchment paper. Bake for about 45 minutes, turning over sections (taking care to not breaking up the clumps too much) halfway through. Once the granola has cooled, mix in the cranberries and store in an airtight container.

Source: The Smitten Kitchen Cookbook

Key Lime Pie – Celebrating Pi Day


IMG_4828

Today is Pi Day! Mathematicians everywhere are celebrating the magical number used in many abdjslsdienkdlkd…. I start to zone out as soon as math is brought into anything. But pie… I can get on board with. So that is how I will be celebrating my 3/14. With my co-workers, who will also be bringing pies to work. Any excuse to eat in excess, right?

IMG_4806

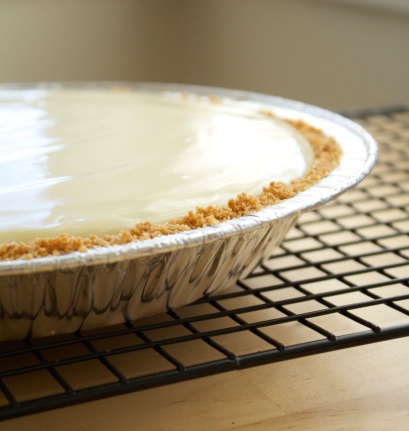
My mom shared this key lime pie recipe with me and it’s so simple. I made it this past weekend for the family and was pleasantly surprised at how quick it came together. I don’t think I’ve ever seen my brother Joe get seconds of pie and I’ve certainly never seen my dad ask for the very last piece. He’s never been much for sweets (unless it was a ding-do

IMG_4751
If you decided to make this, make sure you have enough key limes. It takes about 20 of those little guys to get that ¾ cup of juice. Also, I found that using a garlic press was the quickest and easiest way to get them juiced. Happy Pi Day!

IngredientsIMG_4779
For the crust:
6 tablespoons unsalted butter, melted
10 graham crackers ( or 1 ½ cups cookie crumbs)
2 tablespoons sugar
⅛ teaspoon salt

For the filling:
3 cups sweetened condensed milk
½ cup sour cream
¾ cup key lime juice
2 teaspoons grated lime zest

For the topping:

½ cup heavy whipping cream
half a vanilla bean, seeds scraped out
½ teaspoon vanilla extract
sugar, as desired
lime wedges and zest as desired

Instructions

Preheat oven to 350 degrees F. Crush graham cracker crumbs or pulse in a food processor until finely ground. Mix together with melted butter, sugar, and salt until all the crumbs are evenly coated. Press into a 9-9 ½ inch pie plate keeping an even thickness along the bottoms and up the sides. Place in the oven and bake about 10 minutes, keeping a close eye. Don’t let the top edges brown too much as it will bake additional time with the pie filling.

IMG_4735
In a medium bowl, combine lime juice, zest, condensed milk, and sour cream. Mix well. Pour into the prepared crust. Bake for 5-8 minutes. Tiny pinhole bubbles will begin to form on the surface of the pie. Don’t let it brown. Remove from oven and cool on racks. Chill thoroughly in the refrigerator before serving.

Beat heavy whipping cream, vanilla seeds, extract, and sugar until soft peaks form. Garnish pie just before serving.

IMG_4836

Source: Crust adapted from Smitten’s Smore Pie, Filling from All Recipes 

Sweet Potato and Black Bean Burgers

IMG_4455

I’ve been in a cooking rut. It’s been really boring. Maybe it’s my odd work hours or maybe it’s something else, but we’ve been eating a lot of the same stuff around here. So I made these burgers in hopes of turning things around. I tend to make a lot of veggie burgers. It’s so quick to whip them out of anything in the pantry, whether its beans, quinoa, or even some sort of vegetable fritter on greens. When I saw this recipe with the combination of sweet potato and black beans, I knew it would be a favorite. I love being right about this kind of thing.

IMG_4410
I’m one to stray from recipes and throw in what I have in the fridge just to use it up. Thats what happened here with the green onions (because I’ve been growing my own!) and bell pepper. It ended up being a great addition and the texture was wonderful. I’m always looking for that.

We ate these on some homemade brioche buns and that may have just put them over the top. You can find that recipe, where else? Smitten. I’ll make a batch in the bread maker and keep them in the freezer for burger emergencies like these. Perfect every time.

IMG_4430

Ingredients:

2 cups coarsely mashed sweet potatoes (about two large)
1 cup black beans
1/4 cup green onions, chopped
1/4 cup yellow bell pepper, chopped
1/3 cup panko or bread crumbs
1/3 cup whole wheat flour
1 large egg, lightly beaten
1 teaspoon salt
11/2 teaspoons garlic powder
1/2 teaspoon pepper
1/8 teaspoon red pepper flakes
2-3 tablespoons olive oil

Instructions:

Pierce potatoes all over with a fork and wrap loosely in paper towels. Microwave for 10 minutes, flipping halfway through. Remove the potatoes from the microwave and slice them down the center to allow them to cool.

IMG_4419

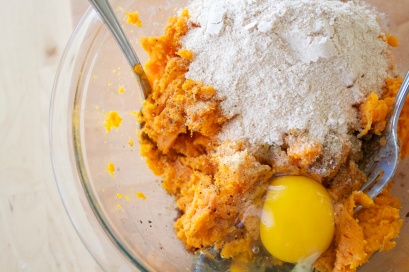
In a large bowl, mash the black beans. Add in sweet potato and mix together. Add in spices, salt, pepper, green onions, bell pepper, bread crumbs, flour, and the egg. Mix together until well combined. Chill mixture in the refrigerator for at least 15 minutes.

IMG_4460Heat a large skillet over medium heat. Add a few tablespoons of olive oil. Scoop large spoonfuls of mixture into the hot pan, pressing them flat and round.(I found it easier to shape the patties while dropping them into the pan, rather than forming them on a separate surface) Cook about 5-6 minutes, until the bottom begins to golden. Gently flip the patty and cook the other side for another 5-6 minutes. Repeat until you’ve used up the mixture. Top and build burgers as desired.


Source: Adapted from How Sweet It Is


Granola Bars

IMG_4542

Oh we’ve been so busy lately. There have been birthdays, work events, actual work, side jobs, side projects, and getting the apartment back together after it completely exploded from having to shift things around to get our new bed in and put together. Not to mention figuring out what to do with the ten thousand pieces of cardboard and styrofoam that came with it. A fort in the living room turned out not to be as cool as I thought.

IMG_4537

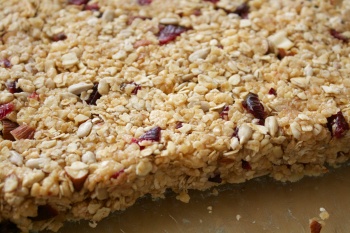
I’ve really been enjoying the birthdays lately. We have a few months in our family where everyone’s birthday is a week apart so I’ve been doing a lot of baking for gifts. I came upon this original recipe and thought something similar might be just the thing for my older brother Ryan. I took out the chocolate, reduced the sugar, and added some sunflower seeds and almonds for an extra crunch. I think they came out really yummy. So yummy that I made a chocolate version for my valentine.

IMG_4475

Ingredients

5 tablespoons butter
1/4 cup, plus 2 tablespoons honey
2-4 tablespoons brown sugar, depending on sweetness preference
1 teaspoon vanilla
2 cups quick cooking oats
1 cup crispy rice cereal
¼ cup sunflower seeds
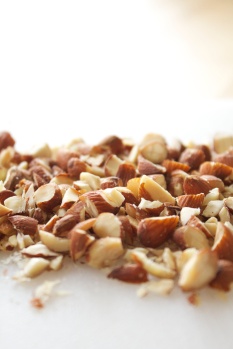
¼ cup almonds, roughly chopped
¼ cup dried cranberries, roughly chopped

Instructions

In a large bowl, stir oats, rice cereal, seeds, almonds, and cranberries. Set aside. In a small saucepan, melt butter, honey and brown sugar together over medium high heat until it comes to a bubble. Reduce heat to medium low and simmer for 2 minutes. Remove from heat and add in the vanilla and stir. Pour over dry ingredients and mix well to moisten everything.

IMG_4516

Pour into a lightly greased pan, compressing the mixture to be about 3/4 inch in thickness. (You may only need to use half of the pan.) Cool on a countertop to room temperature for two hours. Wrap in parchment or plastic wrap and store at room temperature.

Source: adapted from Lauren’s Latest

Soyrizo and Black Bean Empanadas


IMG_4365

I’ve noticed that when we go out into the world on weekends, we spend money. Done. I’ve solved our problem. No seriously though. We met friends for lunch a few weekends ago and we ended up buying a bed. Don’t get me wrong… we are the furthest thing from impulse buyers. Before that day, we had shopped and shopped and shopped until I didn’t ever want to look at another piece of bedroom furniture again. It was just a coincidence that the restaurant our friends chose just happened to be across the street from a West Elm, which happened to have the bed we were considering, and after seeing it in person I was sold. Now I’m done with that purchase for life…until the next round, at least. Woo hoo!

So back to my thing about us spending money. I’ve been getting really creative about using up leftovers because I’m trying to keep us on track for our grocery bill each month. So far, I’ve been doing pretty well. After making these, I’d say I’m stepping up in the leftover-world because this was one of the best creations to come out of my kitchen in a while. Yep, I said it.

IMG_4345The dough was the second half of a batch leftover from having made a pie and the soyrizo was leftover from burritos the night before. I buy black beans dry and had cooked them up a few days previous. I like to have beans on hand to sneak some extra protein into our meals throughout the week, plus bean burritos are my go-to quick lunch. So really, everything was already made. I’m sure next time, some chicken or any other filling that I have left over will get used up.

If you don’t have dough on hand, check out this great tutorial here. To be honest, I think store bought may work for these, but you would have to use round cutters instead of rolling them out like I did.

Ingredients (Makes 16 small empanadas)IMG_4291

Half a batch of pastry dough, thawed if frozen, but still chilled

11/2 cups cooked soyrizo
1 cup black beans, cooked
¼ cup queso fresco
2 tablespoons butter, melted
Coarse salt
Pepper


Instructions

Preheat your oven to 375 F degrees

Make sure your pastry dough is still chilled. Divide in half, and in half again, and so on, until you have 16 equal pieces of dough. I found that keeping the rest of the dough I wasn’t working with in the refrigerator was very helpful. This dough gets very sticky as it comes to room temp.

FoldOver
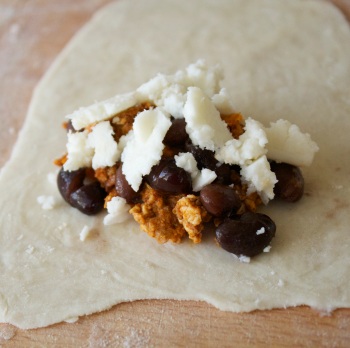
Roll out a small piece of dough to about an ⅛ of an inch thick, keeping it as equally oval as possible. Place about a tablespoon of soyrizo towards the bottom half of the oval. Add a few teaspoons of black beans on top of the soyrizo and top the pile with queso fresco. Fold over the top of the dough so that it covers the filling, lining up the edges as equally as possible. Trim away any large excess, but a bit of extra dough is fine. Seal the edges together with the tines of a fork. Transfer to a baking sheet lined with silpats or parchment paper.

IMG_4337

When all empanadas are complete, melt two tablespoons of butter in the microwave or a small saucepan. Brush over the tops of each empanada. Sprinkle each with a bit of coarse salt and a sprinkle of pepper.

Bake for 16-18 minutes until edges begin to golden. Serve warm.

Baked Cinnamon Sugar Doughnuts

IMG_4144

Does anyone else check their Pinterest ten times a day? No? Yea…uh… me neither. While I was checking mine for the first, or fifth time in a day, I saw this recipe for baked doughnuts. Jordan has told me before that his parents make killer cinnamon sugar doughnuts so I thought a variation like this would be just the treat for him. He’s been working a lot lately.
A few notes about these. Get lazy, and don’t over-knead the dough. It comes together really quick and I really don’t think it needs a lot of work. It’s pretty elastic as is. Also, they dry out pretty quickly. So I recommend making them day-of or the night before you want to enjoy them and keep them in a very airtight container.

IMG_4115
The dough is simple enough that you could add any sort of topping, glaze, or frosting to these. I think a confectioners sugar glaze or a maple coating would be great. That’s how I’ll make these next time. Also, you could probably cut these into any shape you like. Some cute hearts for your valentine or other related shapes depending on the day. I just think they’re so dang cute in the mini rounds. Enjoy!

Ingredients

For the Dough (makes about 15 doughnuts)

3/4 cups warm milkIMG_4124
2 teaspoons active dry yeast
1 tablespoon unsalted butter
1/3 cup sugar
1 egg
2 ½ cups flour
A pinch of ground cloves
½ teaspoon salt

For the Cinnamon Sugar Topping
1/4 cup unsalted butter
1 cup sugar
1 tablespoon cinnamon

Instructions

For the dough, place ¼ cup of the warm milk in the bowl of a mixer fitted with the paddle attachment. Add the yeast into the milk and let it sit for 5 minutes.

In a small liquid measuring cup, combine the remaining milk with the sugar and butter.  Add it to the bloomed yeast mixture and stir to combine.  Add in the egg and give the mixture a good stir until combined.  Add the flour, cloves, salt and mix well. The dough will start to form.  Put the dough hook on the mixer and knead until the dough starts to become smooth, about 2 minutes.

IMG_4129
Place the dough ball in a large lightly greased bowl, and cover with a clean dish towel.  Let sit in a warm place for about an hour, until doubled in size.

Once the dough has doubled, roll it out on a lightly floured surface to half an inch thick.  Using your cutter of choice cut out as many doughnuts as you can get from the dough.

Preheat the oven 375 degrees F.

Place them on a baking sheet lined with silpats or parchment paper, about an inch apart. (They don’t spread during baking) Cover again and let it sit for about 45 minutes.

IMG_4192
Bake for 8 minutes, until lightly golden brown on the bottoms.  Take care not to overbake. Let the doughnuts cool for about 5 minutes.

Melt the butter in a saucepan or in a microwave safe bowl. Combine the cinnamon and sugar  in a small bowl. Dip the topside of the doughnut into the melted butter.  Then dip them into the cinnamon-sugar mixture.  Place on a cooling rack to set, about 5 minutes more. Best when served warm.

IMG_4206

Source: adapted from Krissy’s Creations