White Chocolate “Brownies”

IMG_5640

Twelve more days until I can begin introducing “trigger” foods back into my diet.  I’m counting minutes.  While cutting out these foods for the last three months was easier than I thought it might be, it certainly had its challenges. (And breakdowns. And fits.) I seriously had the brownie cravings. Oddly enough though, I wouldn’t normally consider myself a brownie hound. Or even chocolate for that matter. Don’t get me wrong, I really like chocolate. But given the choice, I usually pick vanilla. I heard on television this morning that vanilla choosers tend to be more reckless and adventurous…Right. That’s why we’re choosing vanilla all the time.

IMG_5609

IMG_5618

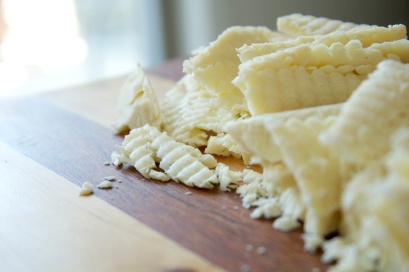
What I realized is that it wasn’t the chocolatey-ness of the brownies that I missed, but it was their chewy-dense-fudgy texture. Especially the edges.  I pick brownie edges first every time. So after watching everyone eat brownies for the last few months, I finally decided I couldn’t wait 12 more days. This recipe happened instead and I’m SO glad it did.  As we’re headed to visit my family this weekend, I’ll be happy to take the rest of this batch with me to share.  Otherwise, I could easily eat all of them.

IMG_5654

Ingredients:

6 oz white chocolate, coarsely chopped

5 tablespoons butter

2 eggs

1 cup sugar

2 teaspoons vanilla

1 cup AP flour

½ teaspoon baking powder

½ teaspoon salt

Instructions:

Preheat your oven to 350 degrees F. Grease a 9×9 inch pan and set aside.

In a small saucepan over low heat, melt the white chocolate and butter. Keep a watchful eye as it can burn quickly. When the mixture is almost all melted, remove from heat and keep stirring. Mine almost looked a bit curdled at this point. Not to worry, it will all come together.

In a separate bowl, whisk the sugar, eggs, and vanilla until nice and smooth. Add the white chocolate mixture and stir until well combined. Add flour, baking soda, and salt. Stir until just combined. Note: If you prefer to add nuts, extra chips, dried fruit, etc, this is a good time to do so.

Spread evenly into your prepared pan. Bake for 25 minutes. The top will be a nice, golden yellow. Cool. Cut. Enjoy.

Source: Slightly adapted from Lovin’ From The Oven

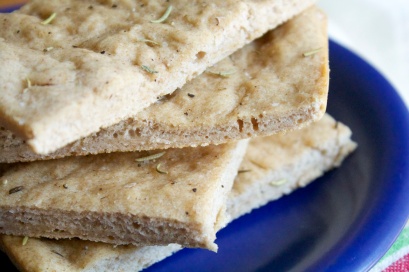
Yeast-less Flat Bread

IMG_5573

So much has changed for us in the last month, I don’t even know where to begin. I guess I’ll start with the major changes. We moved! Yes, no longer in my adorable, teeny-tiny, semi-awkward kitchen. Instead I’m in a huge, finished kitchen, complete with dishwasher (whaaat?!).  I actually complained the other day that the dishwasher won’t empty itself. Yes, I said that. Then I remembered this magic machine actually washes dishes for me. The least I could do is put them away and hope it didn’t hear me complain…
IMG_5579 IMG_5534

Major change number two is my health. I’m not taking migraine medication anymore… For the first time in about 7 years. It’s been almost 3 months, and things are going pretty well. This all came about after my doctor recommended a low/zero Tyramine diet. What? That meant I had to completely take out things like cheese, chocolate, cultured dairy, anything aged/cured, yeasted breads, nuts, onions, and my favorite of them all, avocados. No! The theory behind this diet is that I’m allergic to one/some of these items, which is what could be one cause for the migraines. I’m still not sure that is the case, as I’m still going through the allergy “cleanse”, but seeing the major changes in the way I’ve been feeling is turning me into a believer. I’m hopeful.

So because of this diet change, the way I’ve been cooking and eating has had to change drastically. It’s so difficult to go out and eat at a restaurant now, mostly because onions turn up in just about everything. Because of that, I’ve stepped up my cooking game a lot more. With so many restrictions, it has become my personal challenge to create meals I can still have, without compromising on taste.

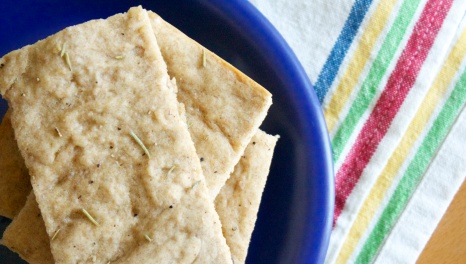
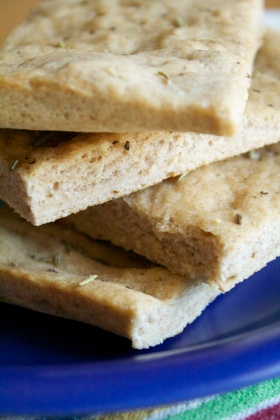
Aside from the yogurts, avocados, and chocolate, fresh bread has been very missed.  I had gotten used to making a loaf of fresh bread almost every week, only to be told I could no longer have it. While I find myself not eating breads/crackers very often anymore, this flatbread recipe helps me get through when I think I need it. Plus, it is super simple to make and can take on any flavor profile you like. My favorite way to eat it is with some tomato and lemon pepper on top.

IMG_5556

Ingredients:

1 cup water

1 cup whole wheat flour

1 cup AP flour

2 teaspoons baking powder

1 teaspoon salt

1 tablespoon extra-virgin olive oil, plus more for pan

1/2 teaspoon fresh ground pepper

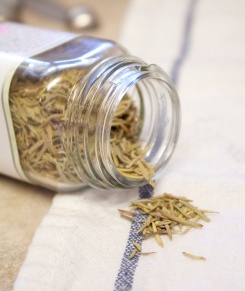
1 teaspoon dried rosemary

Sprinkle of sea salt

Instructions:

Preheat oven to 425 degrees F. Oil a 13×9 inch pan with olive oil.

In the bowl of an electric mixer, whisk both flours, baking soda, and the salt. Add the water over the mixture. Using the dough hook, mix on medium speed until the dough all comes together. It will still be very sticky, but should all be combined well.

Scrape dough out of the bowl and into the prepared pan. Using a little bit of olive oil on your fingers, evenly spread out the dough around the pan, taking it all the way to the edges. Drizzle dough with remaining olive oil. Sprinkle pepper, rosemary, and salt over the top.

Bake for 20 minutes, or until the top just begins to golden. Cut into desired portions.


Adapted from All Recipes

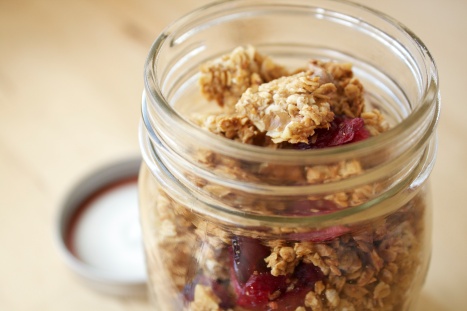
Smitten Maple Granola

IMG_3461

I’ve been loving the Smitten Kitchen cookbook ever since I got it. Which makes perfect sense because I read the blog regularly. What I love about her style of cooking is it seems to practical and her likes seem to align with mine. Perfect. Done, lets get cooking.

IMG_3466

I’m big on breakfast. Especially yogurt, and yogurt with granola. I go through it really quickly and now that I can make my own I don’t feel so bad about it. Even better, this recipe makes the big yummy clusters that I love so much. Lets be honest, I always reach for the clusters first. I made a few modifications because I didn’t have everything in my pantry, but it still came out great.

IMG_3415

Ingredients

3 Cups old fashioned rolled oats (not instant)IMG_3437

1 cup walnuts, coarsely chopped

2 Tablespoon olive oil

1/2 teaspoon salt

1/2 cup maple syrup

1/4 teaspoon ground cinnamon

1 large egg white

1 1/2 cups dried cranberries

Instructions

Preheat oven to 300 degrees

Combine ingredients (except the egg and cranberries) in a large bowl. Whisk the egg white in a small bowl until frothy and then pour over the granola mixture. Mix well. Spread the granola in a single layer onto a baking sheet lined with parchment paper. Bake for about 45 minutes, turning over sections (taking care to not breaking up the clumps too much) halfway through. Once the granola has cooled, mix in the cranberries and store in an airtight container.

Source: The Smitten Kitchen Cookbook

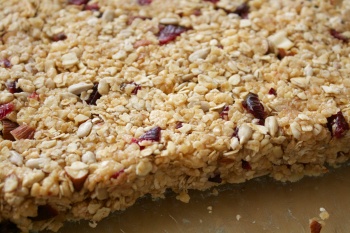
Granola Bars

IMG_4542

Oh we’ve been so busy lately. There have been birthdays, work events, actual work, side jobs, side projects, and getting the apartment back together after it completely exploded from having to shift things around to get our new bed in and put together. Not to mention figuring out what to do with the ten thousand pieces of cardboard and styrofoam that came with it. A fort in the living room turned out not to be as cool as I thought.

IMG_4537

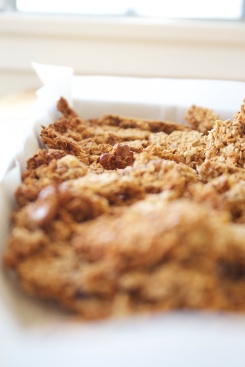
I’ve really been enjoying the birthdays lately. We have a few months in our family where everyone’s birthday is a week apart so I’ve been doing a lot of baking for gifts. I came upon this original recipe and thought something similar might be just the thing for my older brother Ryan. I took out the chocolate, reduced the sugar, and added some sunflower seeds and almonds for an extra crunch. I think they came out really yummy. So yummy that I made a chocolate version for my valentine.

IMG_4475

Ingredients

5 tablespoons butter
1/4 cup, plus 2 tablespoons honey
2-4 tablespoons brown sugar, depending on sweetness preference
1 teaspoon vanilla
2 cups quick cooking oats
1 cup crispy rice cereal
¼ cup sunflower seeds
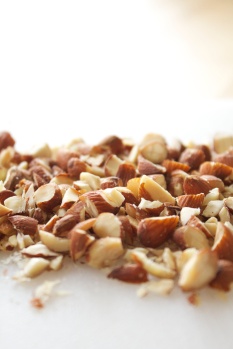
¼ cup almonds, roughly chopped
¼ cup dried cranberries, roughly chopped

Instructions

In a large bowl, stir oats, rice cereal, seeds, almonds, and cranberries. Set aside. In a small saucepan, melt butter, honey and brown sugar together over medium high heat until it comes to a bubble. Reduce heat to medium low and simmer for 2 minutes. Remove from heat and add in the vanilla and stir. Pour over dry ingredients and mix well to moisten everything.

IMG_4516

Pour into a lightly greased pan, compressing the mixture to be about 3/4 inch in thickness. (You may only need to use half of the pan.) Cool on a countertop to room temperature for two hours. Wrap in parchment or plastic wrap and store at room temperature.

Source: adapted from Lauren’s Latest

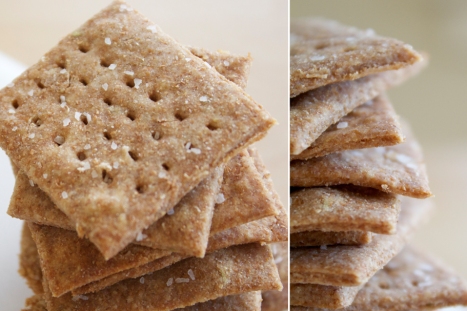
Garlic and Rosemary Wheat Thins

FinishedPicStich

I’ve been a little out of it lately. I guess its a combination of a few things, but mostly, I’ll admit, its just me acting crazy. This morning, the toilet overflowed. Logical reaction? Call the landlord and/or plumber… Nope. This girl cries, called the boyfriend (resisted all urges to call my poor dad in tears), and then I made soup. Soup! Why? I’m still not sure. Plus side, it cooked by the time I decided I was mature enough to mop up the bathroom floor.

DoughPicStitchPrevious to the bathroom fiasco, this week had been a bit on the tough side. Sometimes when that happens I find that I need to slow things down and just bake a little. I knew I was overwhelmed in the sweets department still so something salty sounded perfect. These wheat crackers were just what I needed. I changed up the recipe a tad by adding some garlic and rosemary. With some cheese and pickles (I eat pickles on the side with just about everything) these are a perfect snack and  turned out to be a soothing hour during a rather hectic week.

IMG_3934

Ingredients

1 1/4 cups whole wheat flour
1 1/2 tablespoons sugar
1/2 teaspoon salt, plus extra for topping
1/4 teaspoon garlic powder
1/2 teaspoon dried rosemary, roughly chopped
4 tablespoons unsalted butter
1/3 cup water
1/4 teaspoon vanilla

Instructions

Preheat oven to 400 F.  Line two baking sheets with silpats or parchment paper.

Add flour, sugar, salt, garlic, and rosemary to a wide bowl and whisk to combine.  Cube the butter into small chunks. Using a pastry blender (Or whatever method you prefer), cut the butter into the dry ingredients until it is in small pieces and crumbly.  In a small cup, combine the water and vanilla.  Add it to the flour/butter mixture and using a rubber spatula, mix until a smooth dough forms.  If your dough is too sticky, add a bit more flour.

IMG_3954

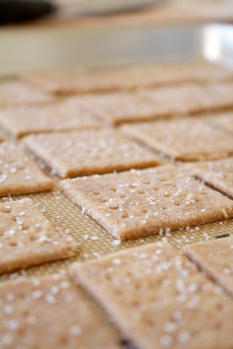
Divide the dough into smaller workable pieces (I divided it into thirds).  Roll the dough out on a lightly floured work surface.  I found that keeping both extra whole wheat flour and a bit of water next to my surface was helpful so I could adjust as needed.  Roll the dough as thinly as possible, 1/16th-inch thick at most. Cut with a knife or pizza cutter into 1-1 ½ inch squares. Transfer crackers to baking sheets. Poke each one with the tines of a fork so they don’t puff up during baking.

Bake one sheet at a time, until crisp and browned, mine took about 9 minutes. Check the crackers at 5 minutes, rotating the baking sheet halfway through. If some begin to brown before others, remove and continue baking the rest. Keep a close eye as the crackers can burn quickly. Once brown and crisp, transfer to a plate to cool. Store crackers in an airtight container.

Source: Adapted from The Baker Chick, Via Tracy’s Culinary Adventures

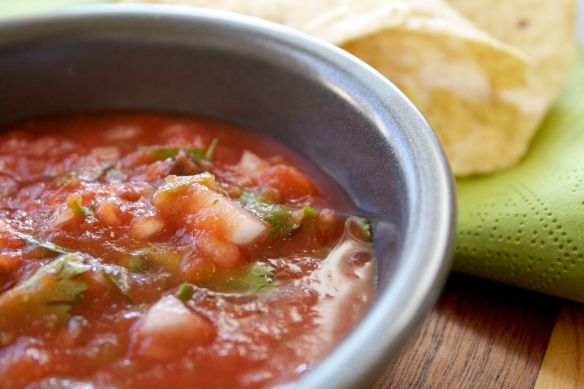
G-Ma’s Salsa

IMG_3787
I’ve been lucky enough to come from a family of wonderful cooks.  I remember the days when extended family would descend on one of the grandmother’s or great aunt’s homes, grab a utensil or a pan, contributing what they could to the meal. Everyone would file through, filling their plates with meats, sauces, heirloom casseroles, fresh salads, and of course, delicious desserts.

Growing up, my Dad’s mom lived in the house below ours. (It’s a super-rad duplex by the beach!) I loved having my Grandma so close and I consider myself lucky to have learned many things from her, including a few tips from her authentic style of Mexican cooking. On the occasional Sunday, she makes a big breakfast for anyone who can stop by. It always includes Menudo, (which I know I never gave a fair shot, but come on) chorizo, eggs,
sometimes carne con chile, and always a fresh batch of her classic salsa.

SalsaPicStitch
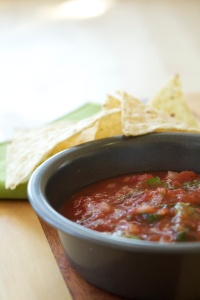
This salsa is kind of a big deal. My best friend Amy has parents who grow their own chilies and make a fresh batch every day, but this is still her favorite salsa.  My friend Bob is equally in love with it and his wife also comes from a family of amazing cooks. When my G-Ma knows that they are coming, she’ll make an extra batch.  And we always eat it.

IMG_3707

Ingredients

1 14 oz can whole peeled tomatoes
2 pickled jalapenos (I use the Embasa brand)
2 teaspoons jalapeno pickling juice (that comes with the jalapenos)
¼ of a white onion, chopped
1 teaspoon coarse salt
½ teaspoon garlic powder
Juice of a lemon
Handful of cilantro, chopped

Instructions

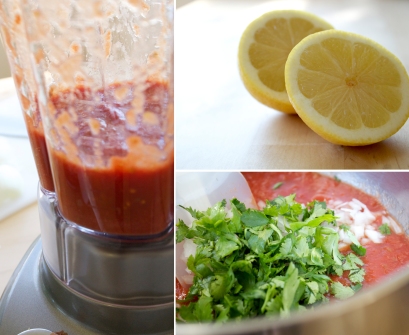
Cut the jalapenos into large chunks, discarding the stems. Toss them into a blender. Add the tomato juice, jalapeno juice, half of the lemon juice, and only one of the peeled tomatoes into the blender. Blend until the jalapeno is finely chopped. Add the rest of the tomatoes. Pulse the blender for just a second or two. You want the tomatoes chopped, but still chunky. Pour tomato mixture into a bowl. Add remaining lemon juice, salt, garlic, onion, and cilantro. Give it a good stir and enjoy.

Note: If you prefer more spice, simply add more jalapenos. I prefer mine on the mild side, so I find that two is the perfect amount for me.

IMG_3797

Source: Taught to me by my Grandma Esther, additionally, learning by watching my Mom make her salsa the same way for most of my life.

Quinoa Cakes on Greens

IMG_3688

I must have cursed myself. I boasted about what a great start the year was off to far too soon. I should have known better. Thirteen is a temperamental number… I must proceed with caution. It’s been almost a year, (that can’t be true?!) since I’ve been sick. So this now unfamiliar pain in my throat is throwing me off. Is it the normal January cold? The awful flu I’ve so artfully avoided? It can’t possibly be strep again, that won my tonsils in the war of ’08… Allergies? I’ll go with that until further notice.

IMG_3695

After getting a call from my boss telling me to take Tuesday off I wasn’t sure what to do with my sudden abundance of time. So, naturally, I made a mess in the kitchen. After ruining half a batch of cupcakes, I scored with these. Major win. I had made these before, but never with all the additional veggies. On a whim I added the lime juice and cilantro. In my opinion, that was the best part.

This is a pretty customizable recipe. I think that as long as you have the binder (breadcrumbs and eggs/other vegan substitution) it would stand up to substitutions. You’ll just have to try and let me know.

IngredientsIMG_3631

2 cups quinoa, cooked and cooled
2 green onions, finely chopped
1/2 a yellow bell pepper, finely chopped
1/4 cup loosely packed cilantro, finely chopped
Juice of 1 lime
1/2 cup white cheddar cheese, grated
1 teaspoon coarse salt
1/2 teaspoon garlic powder
1/2 teaspoon fresh ground pepper
1/2 cup bread crumbs
2 eggs, beaten
Olive oil for the pan

Instructions

In a medium bowl, combine everything except the bread crumbs and the eggs. Sprinkle over the breadcrumbs and make sure all ingredients are all mixed together well.  Add the eggs and give the mixture one final mix-up until the eggs are incorporated. Form the mixture into evenly shaped patties, about 4 inches in diameter.

IMG_3643

Heat some olive oil in large pan set over medium heat. Add the patties to the pan, giving enough space between each one. Cook each patty until lightly browned, about 4-5 minutes, depending on your heat. Using a spatula, carefully flip the patty over and cook the other side until it is the same golden brown. Repeat with remaining patties. You may need to add more olive oil to the pan between batches.

Note: I prefer mine served warm on top of greens and hardboiled eggs with a lemon vinaigrette. 


Source: Adapted from Annie’s Eats, via Super Natural Every Day by Heidi Swanson via The Curvy Carrot

Green Juice Smoothie

IMG_3309

With the year drawing to a close, I can already feel myself trying reset and start fresh again. For me, it’s more about un-doing what happened in December because I know at least in our families, there are so many treats around its just tough not to over do it a little (or a lot.) So here I am, a few days after Christmas, trying to figure out what to have for breakfast. I’m still in that window where I could probably convince myself that pie is a viable option, but at this point, pie is just not pie without the whip. 

So then I decide that a smoothie is just what I need. Then I remember that The Green Juice Smoothie has spinach in it so thats a double win. Perfect. I’ve escaped dessert for breakfast for one day… until tomorrow at least.

I found the recipe over at Annie’s Eats, one of my very favorite blogs. I modified mine just a bit, but we’ve been eating a lot more pears than we used to. I just always forget to add them in. I’ve frozen the bananas before or left them room temp and it comes out great both ways.

IngredientsIMG_3306

1 banana (frozen or at room temp)
1/2 cup frozen pineapple
1 cup orange juice
1 1/2 cups spinach, rinsed and dried
Honey, to taste

Directions

Add all ingredients into a blender. Blend until smooth. Enjoy!

Serves 2

 Source: just slightly tweaked from Annie’s Eats Green Monster Smoothie

Molasses Ginger Cookies


IMG_3200

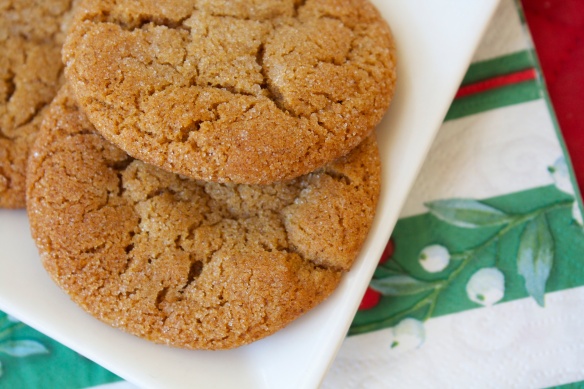
These cookies have become my go-to holiday treat. I’ve made them the last several years and they always come out great with minimal fuss and hardly any time at all. The recipe doesn’t call for butter, which worried me at first, but they have a wonderful texture and aren’t heavy. I like a little bit more of a spice kick so I adjusted from the original recipe, which is reflected below.

We had a very busy holiday, but we got to see most of our family. It was nice to spend a four day weekend with Jordan and catch up with everyone. I’m really looking forward to the new year. 2012 was full of change and I’m hopeful for what lucky 2013 will bring. (especially excited to meet my new little nephew any day now!)

Ingredients

3/4 cup vegetable oilIMG_3184
1 cup sugar
1/4 cup molasses
1 egg
2 cups all-purpose flour
2 teaspoons baking soda
1 teaspoon ground cinnamon
1/2 teaspoon salt
1 teaspoon ground cloves
1/2 ground ginger
Additional sugar, for rolling

Instructions

In a large mixing bowl, combine the oil, sugar, and molasses. It will try and separate on you, but don’t worry.  Add the egg; mix well. In a separate bowl, combine the flour, baking soda, cinnamon, salt, cloves, and ginger; add to sugar mixture. Cover and refrigerate for at least two hours or until easy to work with.

IMG_3194

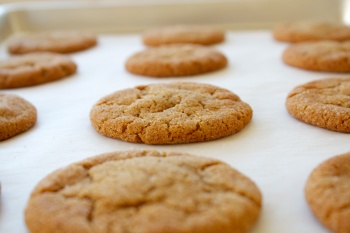
 Shape dough into 1.5-in balls; roll in sugar. Place 3 in. apart on greased baking sheets (or line sheets with parchment or sil-pats). Bake at 375 degrees for 9-11 min or until tops are cracked and edges are set. Cool for 2-3 min before removing to wire racks.

Makes about 2 dozen

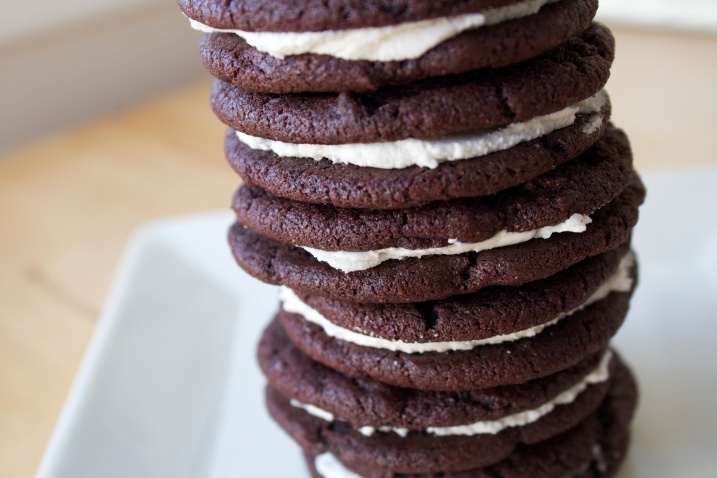
The Infamous Homemade Oreo

IMG_3099

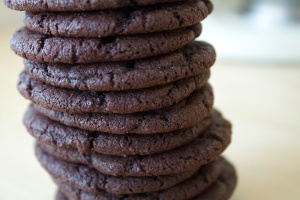
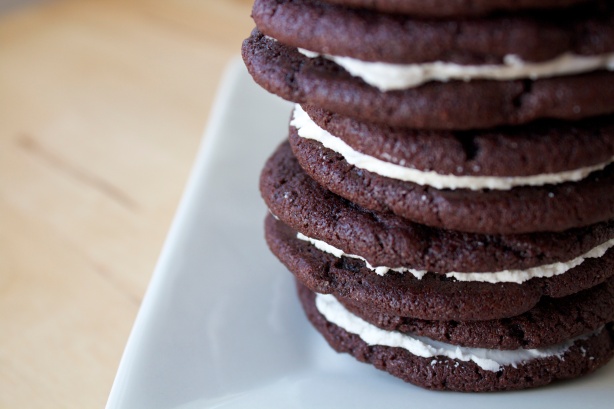
These cookies. I don’t even know.  By far, they get the most attention out of anything else that I make. I’m not sure if it’s an aesthetic thing, how amazingly perfect in texture they always seem to be, or if people just have a nostalgic soft spot for Oreos and judgmental taste buds no longer apply. That’s not it. These cookies would still be outstanding even if I had never had a store bought Oreo in my life. With that being said, use caution where you take these. If you’re like me, and want to try new recipes every time, this is one of those cookies that people ask for over and over again. Deb Pearlman (my go to lady for recipes!) wasn’t kidding about this one.


Ingredients:

1 1/4 cups all-purpose flour

1/2 cup unsweetened cocoa powder

1 teaspoon baking sodaIMG_3098

1/4 teaspoon baking powder

1/4 teaspoon salt

1 1/4 cups sugar

1/2 cup plus 2 tablespoons room-temperature, unsalted butter

1 large egg

For the filling:

1/4 cup room-temperature, unsalted butterIMG_3072

1/4 cup vegetable shortening

2 cups  sifted confectioners’ sugar

2 teaspoons vanilla extract

 Instructions

Set two racks in the middle of the oven. Preheat to 375°F.

In a bowl of an electric mixer, thoroughly mix the flour, cocoa, baking soda and powder, salt, and sugar. On low speed, add the butter, and then the egg. Continue mixing until dough comes together.

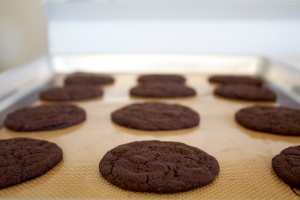
Take rounded teaspoons of batter and place on a parchment lined baking sheet approximately two inches apart. Note: I like to keep the diameter of the wafers on the small side. After all, they will be sandwiched together in the end. With moistened hands, slightly flatten the dough. Bake for 9 minutes. Set baking sheets on a rack to cool.

To make the cream, place butter and shortening in a mixing bowl, and at low speed, gradually beat in the sugar and vanilla. Turn the mixer on high and beat for 2 to 3 minutes until filling is light and fluffy.

IMG_3108

To assemble the cookies, using a knife, spread about a teaspoon of cream into the center of one cookie. Place another cookie, equal in size to the first, on top of the cream. Lightly press, to work the filling evenly to the outsides of the cookie. Continue this process until all the cookies have been sandwiched with cream.

Source: Slightly adapted (for less sweetness, as Deb notes) from Smitten Kitchen